People often dispute whether or not post processing (in most instances “Photoshopping”) professional pictures is necessary. My answer is a resounding YES!!! Even if just slightly adjusting the lighting or contrast, any great qualities you saw with your eye when capturing the photo can again become apparent in photos through post possessing. All photos however, need different levels of post-processing. Family photos for example are typically taken at a short distances and often require very minimal post processing. Newborn photography, on the other hand, may require a significant amount of time in post processing.
Below I will show you a basic newborn image and walk you through some of the post processing steps in newborn photography. Keep in mind that taste is subjective. Some of you may like the BEFORE straight out of camera (SOOC) image. Others may think image 2 or 3 look good and the post processing could end there. While many will enjoy the “moody” black and white image I inevitably finish with. This subjective nature to art and photography is why choosing a photographer whose portfolio images match your style/preferences is so important.

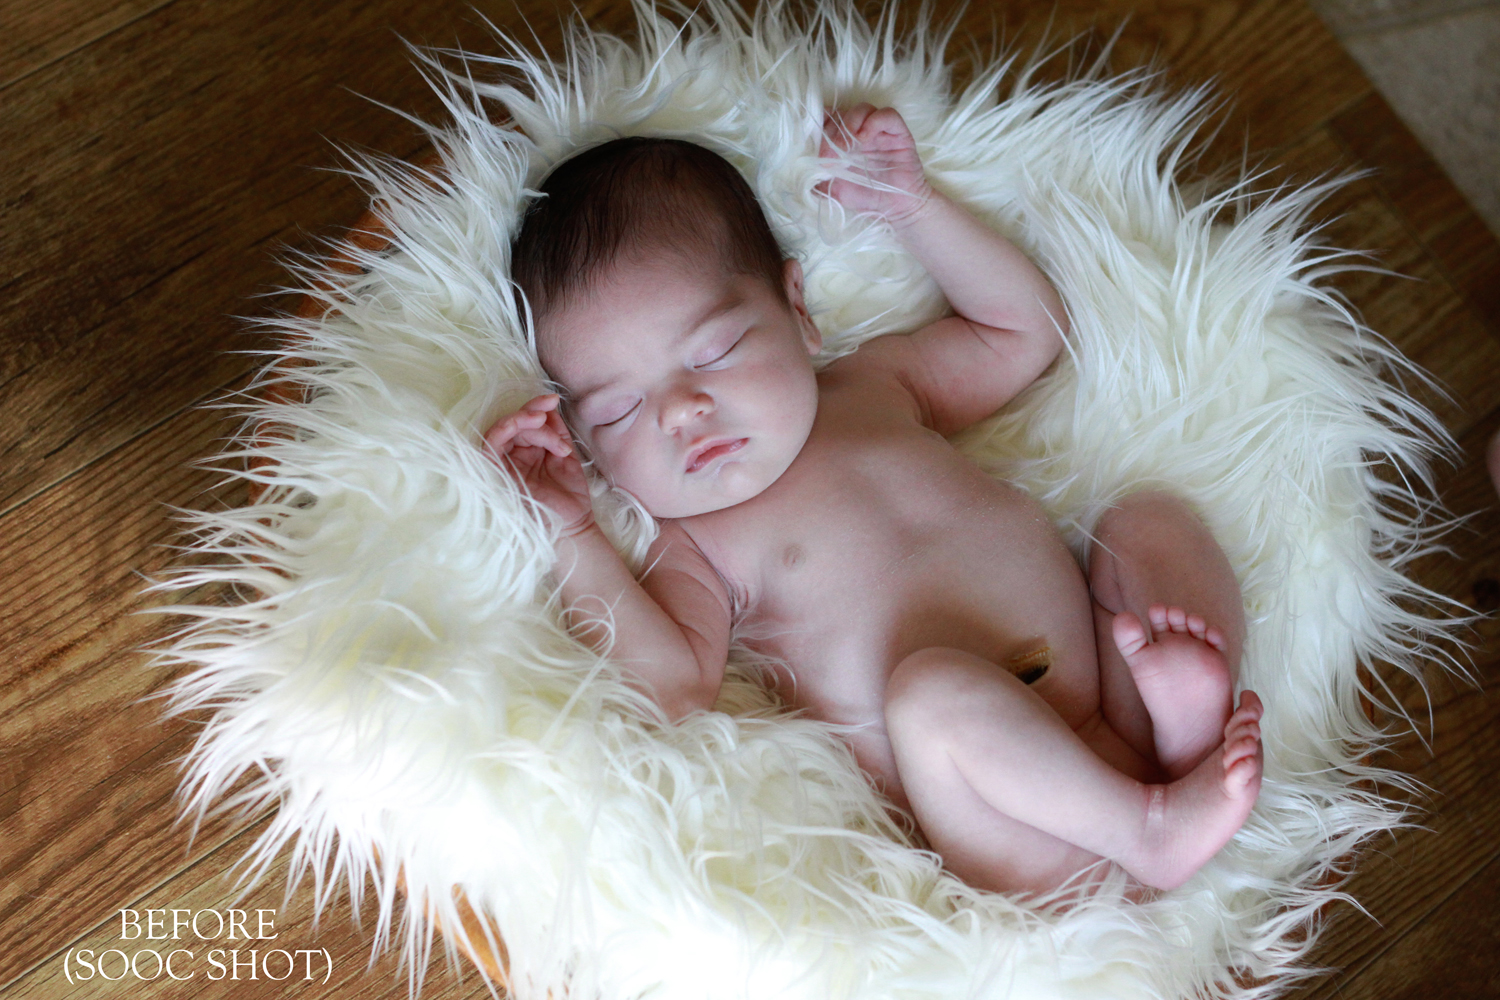
Image 1 is the SOOC image. When shooting the newborn in this pose I intentionally overexposed this image so that when I converted it to black and white I would have a little more natural contrast (the bright white areas). I also turned the baby at more of a parallel position to my light source to add the shadows to the side of the face.

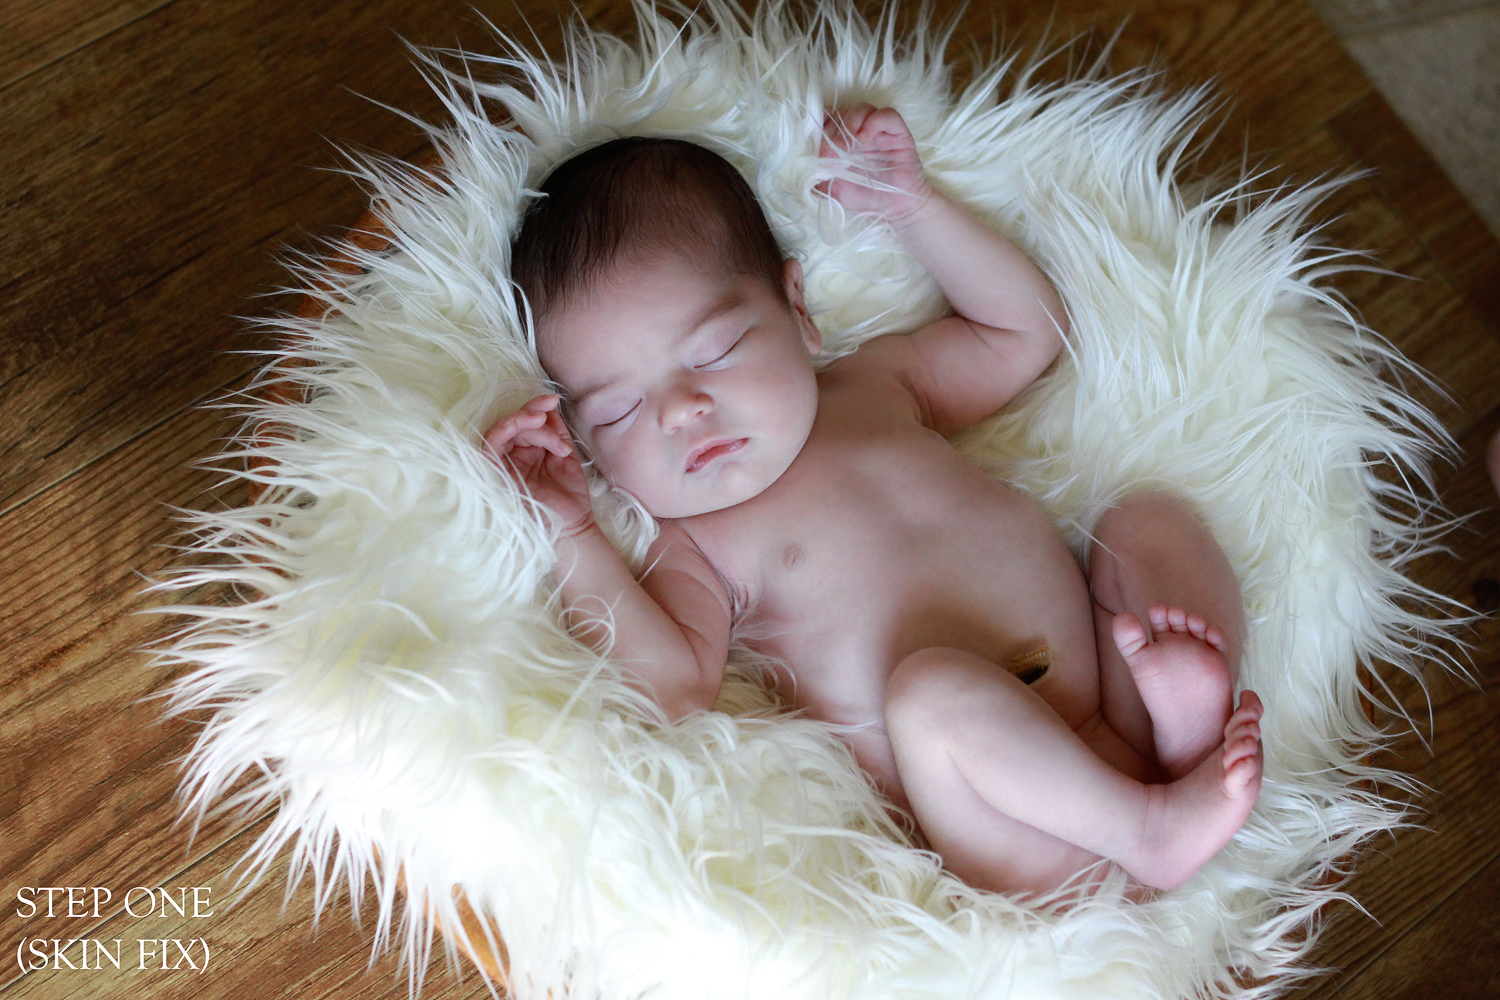
Image 2- I begin the post editing by adjusting the lighting and contrast very slightly and then spend a few minutes cleaning up the skin. This baby has red blotches, flaky skin and some baby acne. This is very typical in newborns and a big reason that post processing newborn images can be quite tedious. I am very light handed in skin retouching compared to many newborn photographers. I like to retain the “skin like” qualities in the image and not have the baby look too smooth. Some people like the very smooth look on newborns but I find they can quickly look plastic.

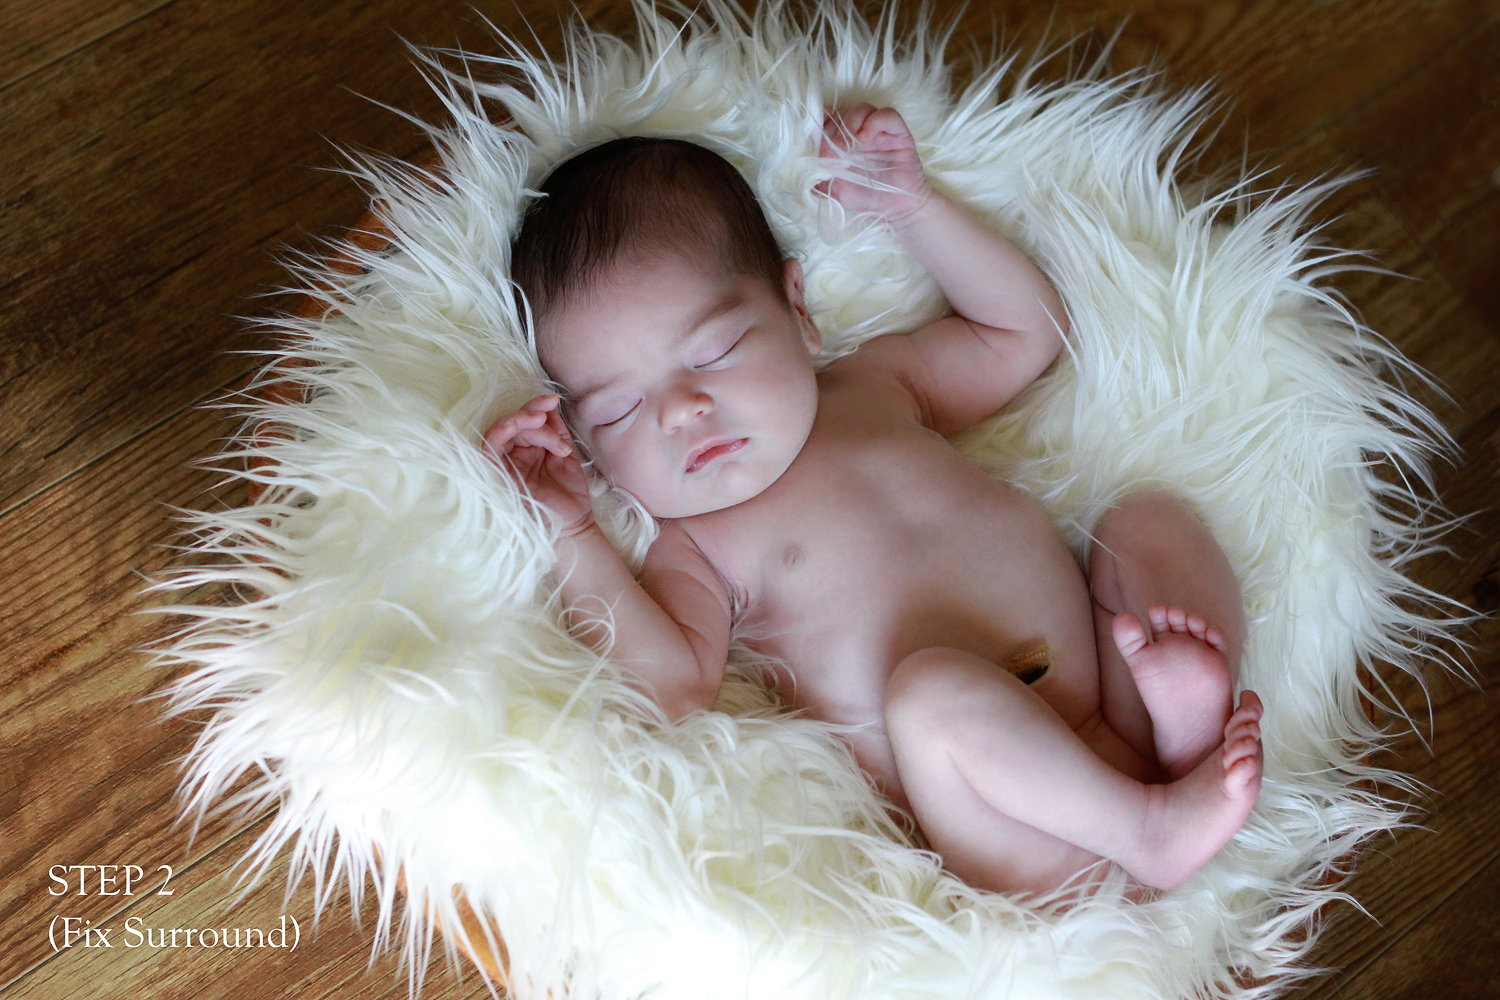
Image 3- Once I fix the minor things on the skin and face I zoom back and look at the image as a whole. In this shot the sub floor shows in the upper right hand corner and just below that you can see the edge of the mom’s knee a bit. I clean both of those things up so the focus is just the baby. This can also be done through cropping but I chose to fill the background in.

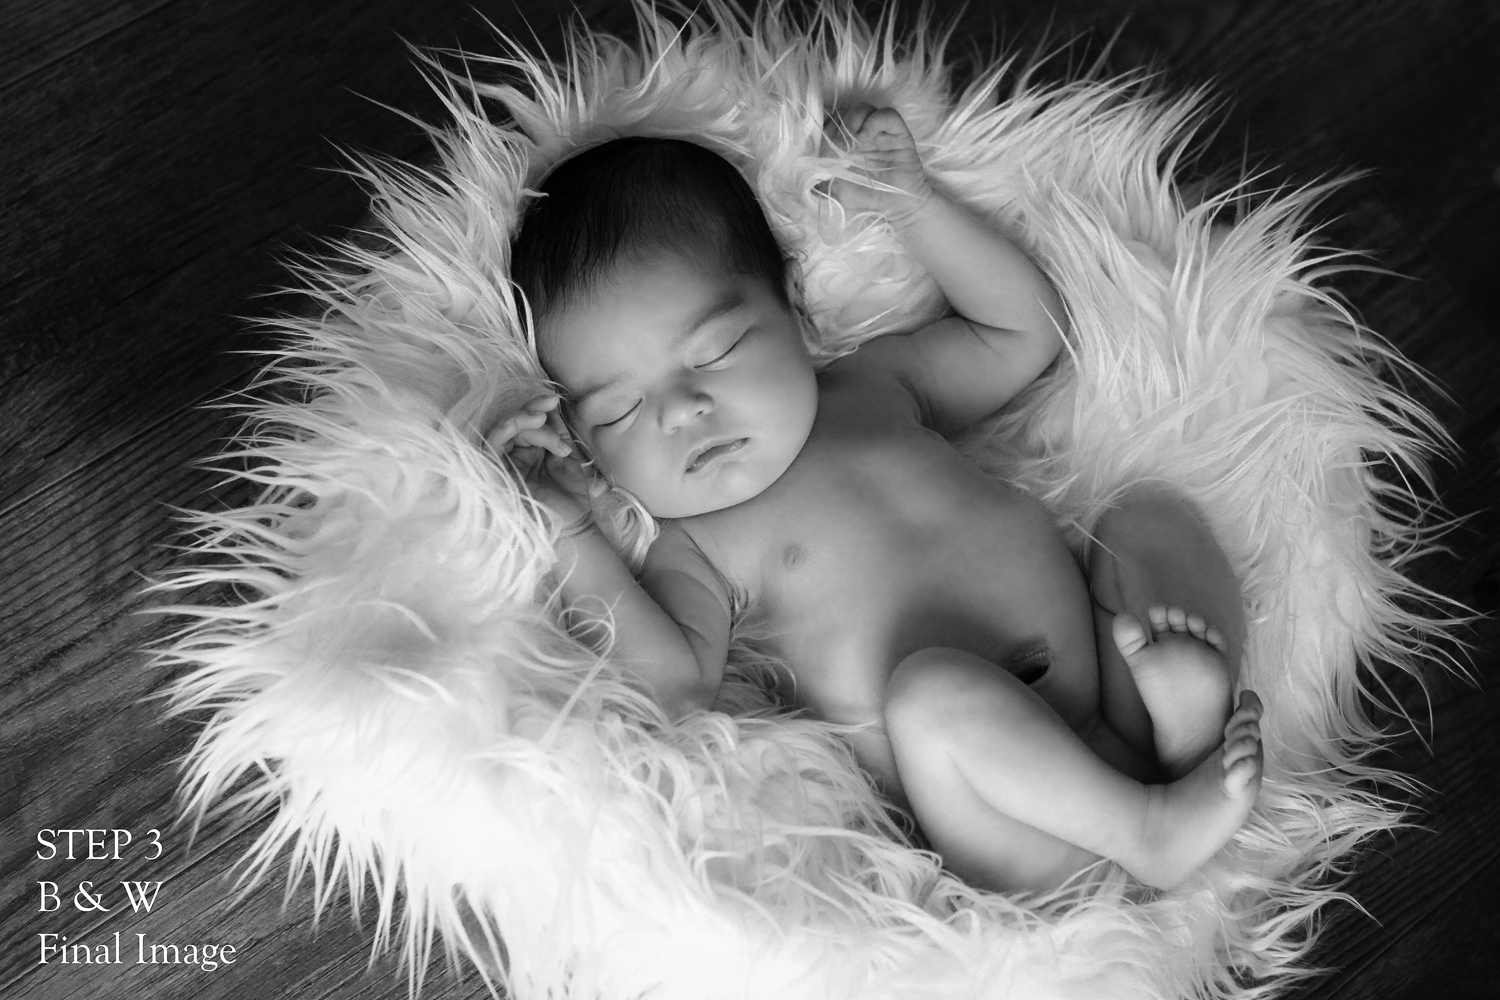
Image 4- This is where an over exposed/high contrast color image becomes a cool looking black and white photo. By converting the image to black and white the highs and lows that are a not that pleasing in the color photo, become artful through a black and white lens.
Again you may prefer the color image, or like me you may prefer the balck and white look… either way you can hopefully see why post processing really brings the photo to life.
Leave a Reply